How to make ripple page transition in 3 minutes using Flutter
Flutter makes beautiful animations easy. That’s the fact. What is also the fact is that we as developers are scared to push our apps to the next level by adding those minor animations that make the app beautiful instead of just pretty. Let’s change it together! In this post, I’d like to show you how we can add a ripple effect that may make your client say “I like that!”.
Desired effect
Starting point
As a starting point, let’s have a simple app having two pages and transition between them. When a user clicks the FloatingActionButton, he gets redirected to the second page.
import 'package:flutter/material.dart';
void main() => runApp(MyApp());
class MyApp extends StatelessWidget {  @override  Widget build(BuildContext context) {    return MaterialApp(      title: 'Fab overlay transition',      theme: ThemeData(        primarySwatch: Colors.blue,      ),      home: MyHomePage(),      debugShowCheckedModeBanner: false,    );  }}
class MyHomePage extends StatefulWidget {  @override  _MyHomePageState createState() => _MyHomePageState();}
class _MyHomePageState extends State<MyHomePage> {  void _onTap() {    Navigator.of(context).push(FadeRouteBuilder(page: NewPage()));  }
  @override  Widget build(BuildContext context) {    return Scaffold(      appBar: AppBar(title: Text('Fab overlay transition')),      body: Center(child: Text('This is first page')),      floatingActionButton: FloatingActionButton(        onPressed: _onTap,        child: Icon(Icons.mail_outline),      ),    );  }}
class FadeRouteBuilder<T> extends PageRouteBuilder<T> {  final Widget page;
  FadeRouteBuilder({@required this.page})      : super(          pageBuilder: (context, animation1, animation2) => page,          transitionsBuilder: (context, animation1, animation2, child) {            return FadeTransition(opacity: animation1, child: child);          },        );}
class NewPage extends StatelessWidget {  @override  Widget build(BuildContext context) {    return Scaffold(      appBar: AppBar(        title: Text('NewPage'),      ),    );  }}
And it looks like this:
Starting point
Getting FAB position
In order to perform our ripple effect, we need to have the starting position of the Floating Action Button. The easiest way to do it is to use rect_getter package by DebuggerX. Let’s add it to the pubspec.yaml:
dependencies: flutter: sdk: flutter rect_getter: 0.0.1 #<-- add thisAnd now let’s use it. To do so, we need a Key which we can later refer to in order to get FAB’s position. We will pass that key to the RectGetter widget which will wrap out FloatingActionButton:
import 'package:rect_getter/rect_getter.dart'; //<--Import rect getter...class _MyHomePageState extends State<MyHomePage> {  GlobalKey rectGetterKey = RectGetter.createGlobalKey(); //<--Create a key  Rect rect;                                              //<--Declare field of rect
  void _onTap() {    setState(() => rect = RectGetter.getRectFromKey(rectGetterKey)); //<--onTap, update rect    Navigator.of(context).push(FadeRouteBuilder(page: NewPage()));  }
  @override  Widget build(BuildContext context) {    return Scaffold(      appBar: AppBar(title: Text('Fab overlay transition')),      body: Center(child: Text('This is first page')),      floatingActionButton: RectGetter(           //<-- Wrap Fab with RectGetter        key: rectGetterKey,                       //<-- Passing the key        child: FloatingActionButton(          onPressed: _onTap,          child: Icon(Icons.mail_outline),        ),      ),    );  }}
Adding ripple widget
If we want to have one widget on top of others, there are two Widgets we should think of: Overlay and Stack. Both of them let us position widgets anyway we want. Even though Overlay would suit nicely to the expand animation, it gets a bit more tricky when we want to navigate to another page, so today we will go with a Stack.
@overrideWidget build(BuildContext context) { return Stack( //<-- Wrap Scaffold with a Stack children: <Widget>[ Scaffold( ... ), _ripple(), //<-- Add the ripple widget ], );}Having _ripple() appear after the Scaffold ensures, that whatever ripple will look like, it will be drawn on top of the Scaffold. How should ripple look like? For now, let’s make it an empty Container if there is no rect saved. If there is rect saved, let’s draw a circle in the exact position of the Floating Action Button. To place a Widget in the Stack on the exact position, we can use Positioned widget:
Widget _ripple() { if (rect == null) { return Container(); } return Positioned( left: rect.left, //<-- Margin from left right: MediaQuery.of(context).size.width - rect.right, //<-- Margin from right top: rect.top, //<-- Margin from top bottom: MediaQuery.of(context).size.height - rect.bottom, //<-- Margin from bottom child: Container( //<-- Blue cirle decoration: BoxDecoration( shape: BoxShape.circle, color: Colors.blue, ), ), );}If we comment out the transition to the next page, the effect will be a blue dot covering our floating action button after it is clicked.
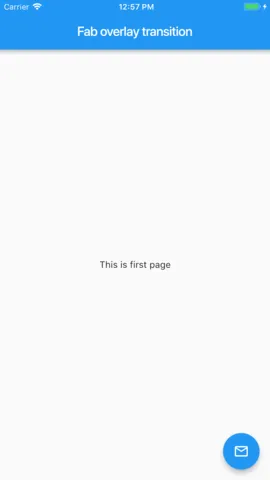
Before
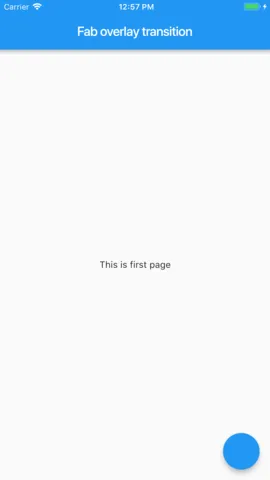
After
Expanding ripple widget
Now it’s time to expand the widget to the full screen. There are two things we need to cover: setting the desired dimensions of the blue dot and adding animation between small and big circle.
To change the size of the ripple, we will use Rect.inflate() method. This method causes Rect to grow in each direction by a specified distance. In our case, it will be the longest side of the screen multiplied by 1.3 just to make sure the final circle will cover the whole screen. However, we cannot change the size right after we set it to the original one (covering the fab). We need to delay it a bit, to be more specific, we just need a one frame delay. That’s why we will use WidgetsBinding.postFrameCallback. Having that, we are sure that there is a small circle for one frame and then it becomes the big one. After a short delay, we can move to the other page. The code looks like that:
class _MyHomePageState extends State<MyHomePage> {  final Duration animationDuration = Duration(milliseconds: 300);  final Duration delay = Duration(milliseconds: 300);  GlobalKey rectGetterKey = RectGetter.createGlobalKey();  Rect rect;
  void _onTap() async {    setState(() => rect = RectGetter.getRectFromKey(rectGetterKey));  //<-- set rect to be size of fab    WidgetsBinding.instance.addPostFrameCallback((_) {                //<-- on the next frame...      setState(() =>          rect = rect.inflate(1.3 * MediaQuery.of(context).size.longestSide)); //<-- set rect to be big      Future.delayed(animationDuration + delay, _goToNextPage); //<-- after delay, go to next page    });  }
  void _goToNextPage() {    Navigator.of(context)        .push(FadeRouteBuilder(page: NewPage()))        .then((_) => setState(() => rect = null));  }  ...}
And the effect is blinking blue page transitioning to the new one:
Why is the effect so bad? Because we haven’t introduced any animations yet. The Positioned widget simply updates its boundaries presenting the blue screen to the user. Luckily, if we want this transition from a small dot to blue screen go smoothly, we can just replace Positioned with AnimatedPositioned!
Widget _ripple() { if (rect == null) { return Container(); } return AnimatedPositioned( //<--replace Positioned with AnimatedPositioned duration: animationDuration, //<--specify the animation duration left: rect.left, right: MediaQuery.of(context).size.width - rect.right, top: rect.top, bottom: MediaQuery.of(context).size.height - rect.bottom, child: Container( decoration: BoxDecoration( shape: BoxShape.circle, color: Colors.blue, ), ), );}AnimatedPositioned will take care of our animation leaving us with the result:
And that’s it!
As you can see, we needed only Stack, RectGetter and AnimatedPositioned to get this nice animation you can use in your app.
I hope that post was useful for you. The full code can be found here.
Cheers! 🙂