Stripe Checkout in mobile Flutter app
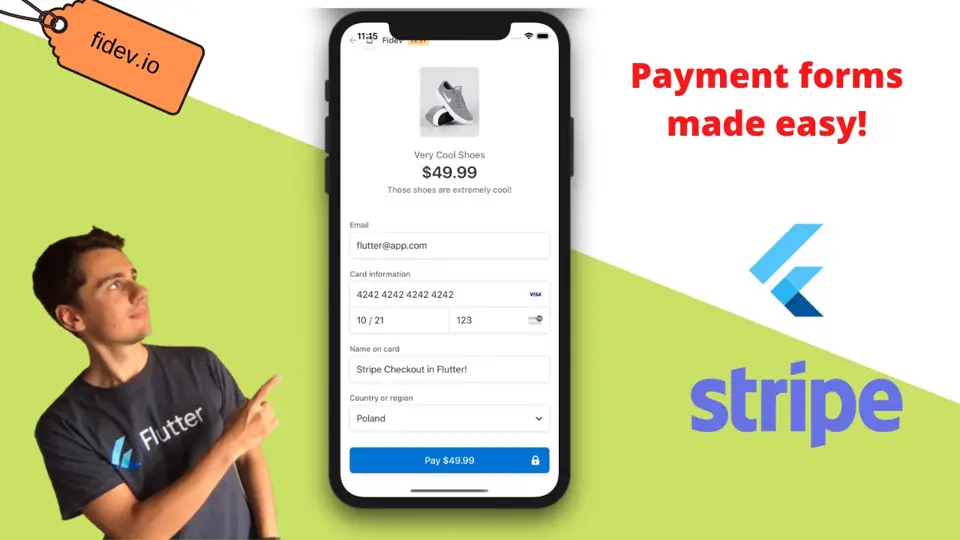
Have you ever struggled to integrate card payments into your mobile Flutter app? If so, today is your lucky day! In this post, I present how to use Stripe Checkout in the Flutter app without any hassle!
What is Stripe Checkout?
Stripe Checkout is a feature from Stripe which handles collecting all the payment data for you. Normally, services like Stripe, Square or Braintree offer you storing all payments information your app collects but they leave the UI part to the developers. This means having to handle all those boring stuff like card validation, 3D authentication, etc. which is not something you as a developer want to do.
Stripe Checkout is a customizable website to which you can redirect your users and where all the data will be collected and send to the backend. It leaves very little for you to worry about, therefore it’s easier and safer than the traditional way.
Payment flow
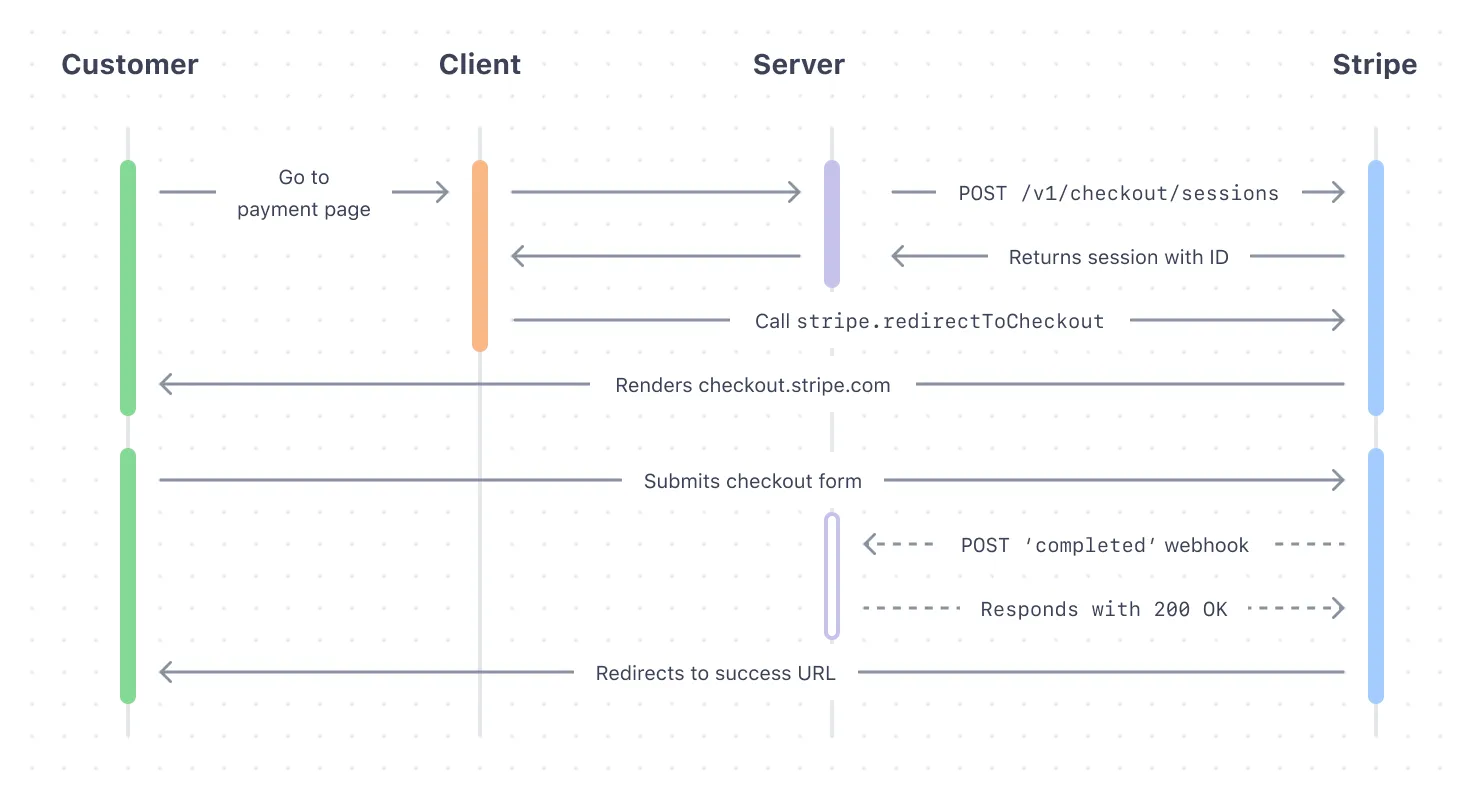
The flow is relatively easy, user presses the button, we (as a mobile app) ask the server to create a session, server returns the session id, we redirect to checkout page with that id. That’s the beauty of Stripe Checkout, it leaves very little to do for us as mobile developers.
Server Stub
Since I want this post to be as understandable as possible, I decided to create a stub of a real server. We will create a Server class in our Flutter app which will call Stripe API. This reduces the complexity of this workflow as we only need one source code to get the payment, however, it also introduces HUGE SECURITY VULNERABILITY as in the example I will have a Secret Key obtained from Stripe in my mobile app. This is a big no-no. You can’t have your secret key installed somewhere in your users’ devices. I know it works but please, DON’T DO IT IN REAL APPS. This stuff should be done by the backend team. 😉
/// Only for demo purposes!/// Don't you dare do it in real apps!class Server {  Future<String> createCheckout() async {    final auth = 'Basic ' + base64Encode(utf8.encode('$secretKey:'));    final body = {      'payment_method_types': ['card'],      'line_items': [        {          'price': nikesPriceId,          'quantity': 1,        }      ],      'mode': 'payment',      'success_url': 'https://success.com/{CHECKOUT_SESSION_ID}',      'cancel_url': 'https://cancel.com/',    };
    try {      final result = await Dio().post(        "https://api.stripe.com/v1/checkout/sessions",        data: body,        options: Options(          headers: {HttpHeaders.authorizationHeader: auth},          contentType: "application/x-www-form-urlencoded",        ),      );      return result.data['id'];    } on DioError catch (e, s) {      print(e.response);      throw e;    }  }}
Getting the session id
Let’s start with simple button which will call our “server” and get the new session id for the checkout:
class MyApp extends StatelessWidget {  @override  Widget build(BuildContext context) {    return MaterialApp(      title: 'Flutter Stripe Checkout Demo',      theme: ThemeData(        visualDensity: VisualDensity.adaptivePlatformDensity,      ),      home: HomePage(),    );  }}
class HomePage extends StatelessWidget {  Widget build(BuildContext context) {    return Scaffold(      body: Builder(        builder: (context) => Center(          child: RaisedButton(            onPressed: () async {              final sessionId = await Server().createCheckout();              Scaffold.of(context).showSnackBar(                SnackBar(                  content: Text('sessionID: $sessionId'),                ),              );            },            child: Text('Pay!'),            color: Colors.blue,          ),        ),      ),    );  }}
Preparing the webview
Stripe checkout works only in web technologies (HTML + CSS). It means we have to use WebView package to display it. What’s more, we need to have control on our webview so that we can include stripe script in it to redirect to the checkout page later on.
class CheckoutPage extends StatefulWidget {  final String sessionId;
  const CheckoutPage({Key key, this.sessionId}) : super(key: key);
  @override  _CheckoutPageState createState() => _CheckoutPageState();}
class _CheckoutPageState extends State<CheckoutPage> {  WebViewController _controller;
  @override  Widget build(BuildContext context) {    return Scaffold(      resizeToAvoidBottomInset: false,      body: WebView(        initialUrl: initialUrl,        javascriptMode: JavascriptMode.unrestricted,        onWebViewCreated: (controller) => _controller = controller,      ),    );  }
  String get initialUrl =>      'data:text/html;base64,${base64Encode(Utf8Encoder().convert(kStripeHtmlPage))}';}
const kStripeHtmlPage = '''<!DOCTYPE html><html><script src="https://js.stripe.com/v3/"></script><head><title>Stripe checkout</title></head><body>Hello Webview</body></html>''';
Notice that our HTML page is stored in a normal string and then just encoded. It could also be loaded from the file if you prefer it that way. It also has the <script> tag with the Stripe library being loaded.
Now we can redirect to the CheckoutPage after obtaining the session id:
Redirecting to Stripe Checkout
Once we have the webview, we can use it do display the Stripe Checkout page. According to the docs, all we have to do is call js function stripe.redirectToCheckout(...). Luckily, WebViewController allows us to just run any javascript code inside the webview and that’s what we’ll do.
The important part here is when we will do it. We would like to redirect to checkout as soon as possible but unfortunately, we need to wait for stripe library defined in the previous step to be loaded. Because of that, we will not call it in initState but in onPageFinished callback which is being called only after all the scripts have been downloaded.
class _CheckoutPageState extends State<CheckoutPage> {  WebViewController _controller;
  @override  Widget build(BuildContext context) {    return Scaffold(      resizeToAvoidBottomInset: false,      body: WebView(        ...        onPageFinished: (String url) { //<---- add this          if (url == initialUrl) {            _redirectToStripe();          }        },      ),    );  }
  void _redirectToStripe() { //<--- prepare the JS in a normal string    final redirectToCheckoutJs = '''var stripe = Stripe(\'$apiKey\');
stripe.redirectToCheckout({  sessionId: '${widget.sessionId}'}).then(function (result) {  result.error.message = 'Error'});''';    _controller.evaluateJavascript(redirectToCheckoutJs); //<--- call the JS function on controller  }}
And this is enough to proceed with the payment!
Handling the result
After completing the form, the payment will be handled by Stripe. It will also send the webhook event to the backend to process the transaction from the business perspective. As a mobile developer, all you have to do is nicely show the user, that the checkout has succeeded. How can we do it?
When we created a checkout session in the “server” we passed the successUrl and cancelUrl. Stripe will redirect the user to those URLs based on the payment result. Obviously, we can just have prepared the website with proper message etc, but what we can also do is catch those redirects and handle the result directly in Flutter. All we have to do is look for certain URLs used in the webview using navigationDelegate.
WebView( ... navigationDelegate: (NavigationRequest request) { if (request.url.startsWith('https://success.com')) { Navigator.of(context).pop('success'); // <-- Handle success case } else if (request.url.startsWith('https://cancel.com')) { Navigator.of(context).pop('cancel'); // <-- Handle cancel case } return NavigationDecision.navigate; },),And that’s it!
Now the whole payment process looks like this:
Important notice on Live integration!
Some of you mentioned that what I showed you in the video doesn’t work for Stripe live, and I am sorry to say that it is true. HOWEVER! There is an easy solution to that, basically, we need to have our simple HTML deployed on the Https website and it will still work! I’ve put the same HTML in a repository and deployed it on GitHub pages and it worked on live! I’ve just paid myself 2 PLN 😀 I’m sorry for not checking it on live before publishing. Let me know if it works for you.
Notice how little work it required comparing to creating the form by yourself!
As always, the whole code is on the Github [here].
The YouTube version is [here].
And if you want to learn more about Stripe Checkout, the official docs are very well written.
Cheers! 💙