3D Kinetic Type Poster in Flutter
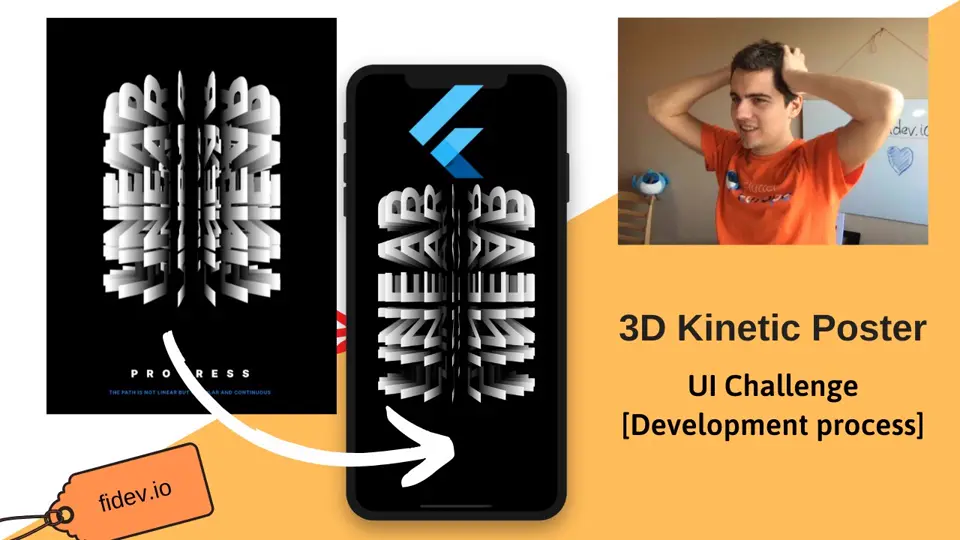
In this post, we’re going to learn how to create probably the most useless effect on this blog. Why would you want to learn such a thing? Well, it looks really cool and maybe you will find some cool applications for it! 😀 The design is named 3D CSS Kinetic Type Poster. It was created by Pete Barr, who shared the design on dribbble and the front-end implementation on codepen. Let’s see if we can do it in Flutter as well!
Unfortunately, I didn’t get to create the entrance animation, so we will focus only on the main rotation. 😉
Static text
Let’s start by creating a “LINEAR” text widget. We need it to be rotated, so the best option in this scenario is to use RotatedBox. It’s pretty straight forward:
class LinearText extends StatelessWidget { @override Widget build(BuildContext context) { return RotatedBox( quarterTurns: 3, child: Text( 'LINEAR', style: TextStyle( color: Colors.white, fontSize: 110, ), ), ); }}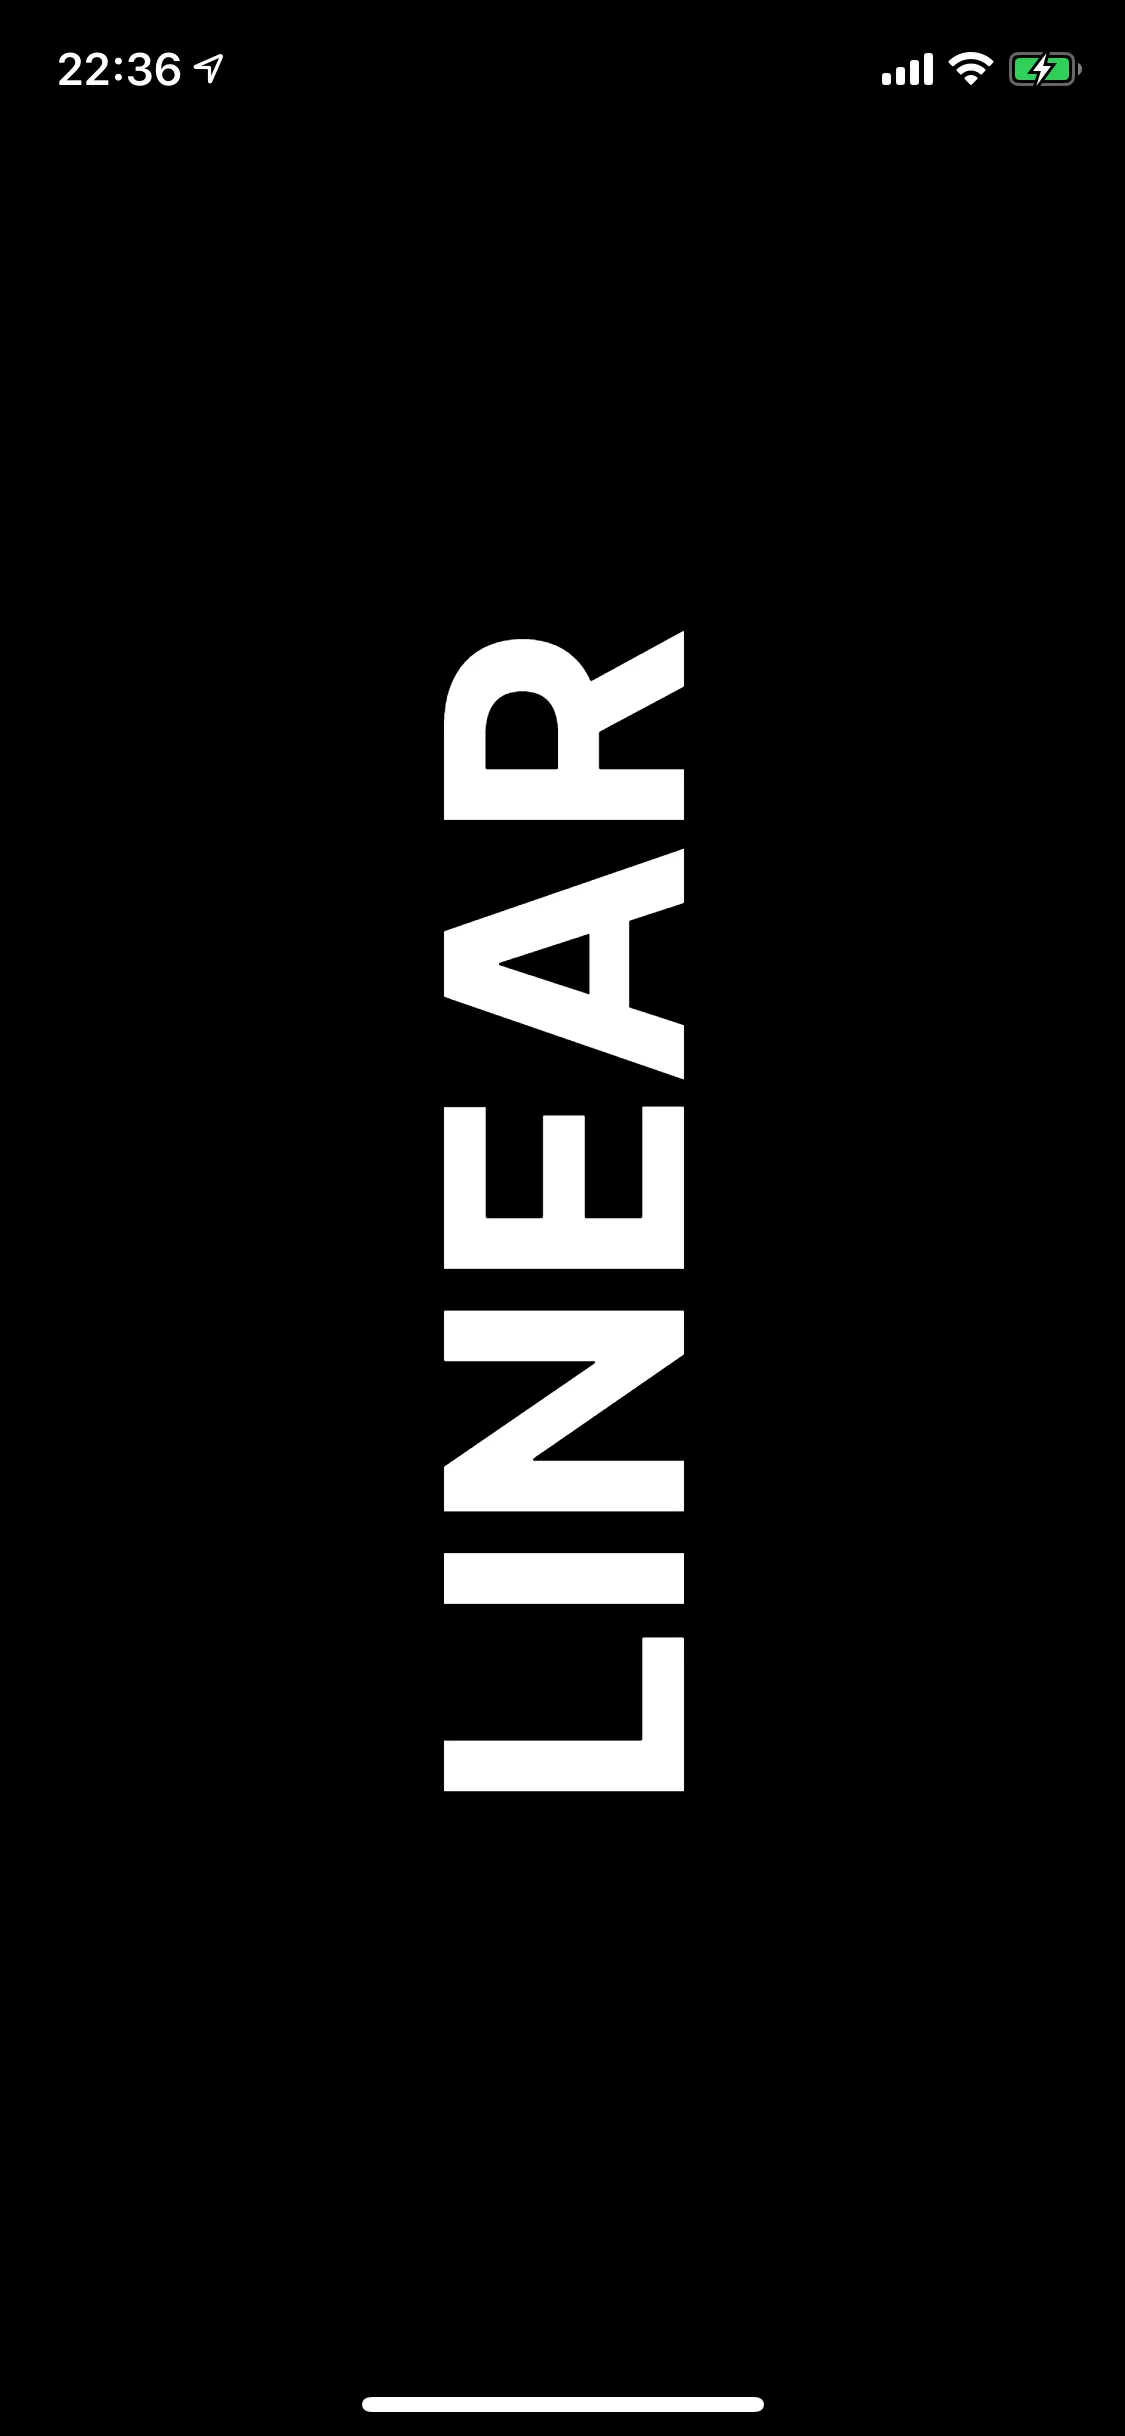
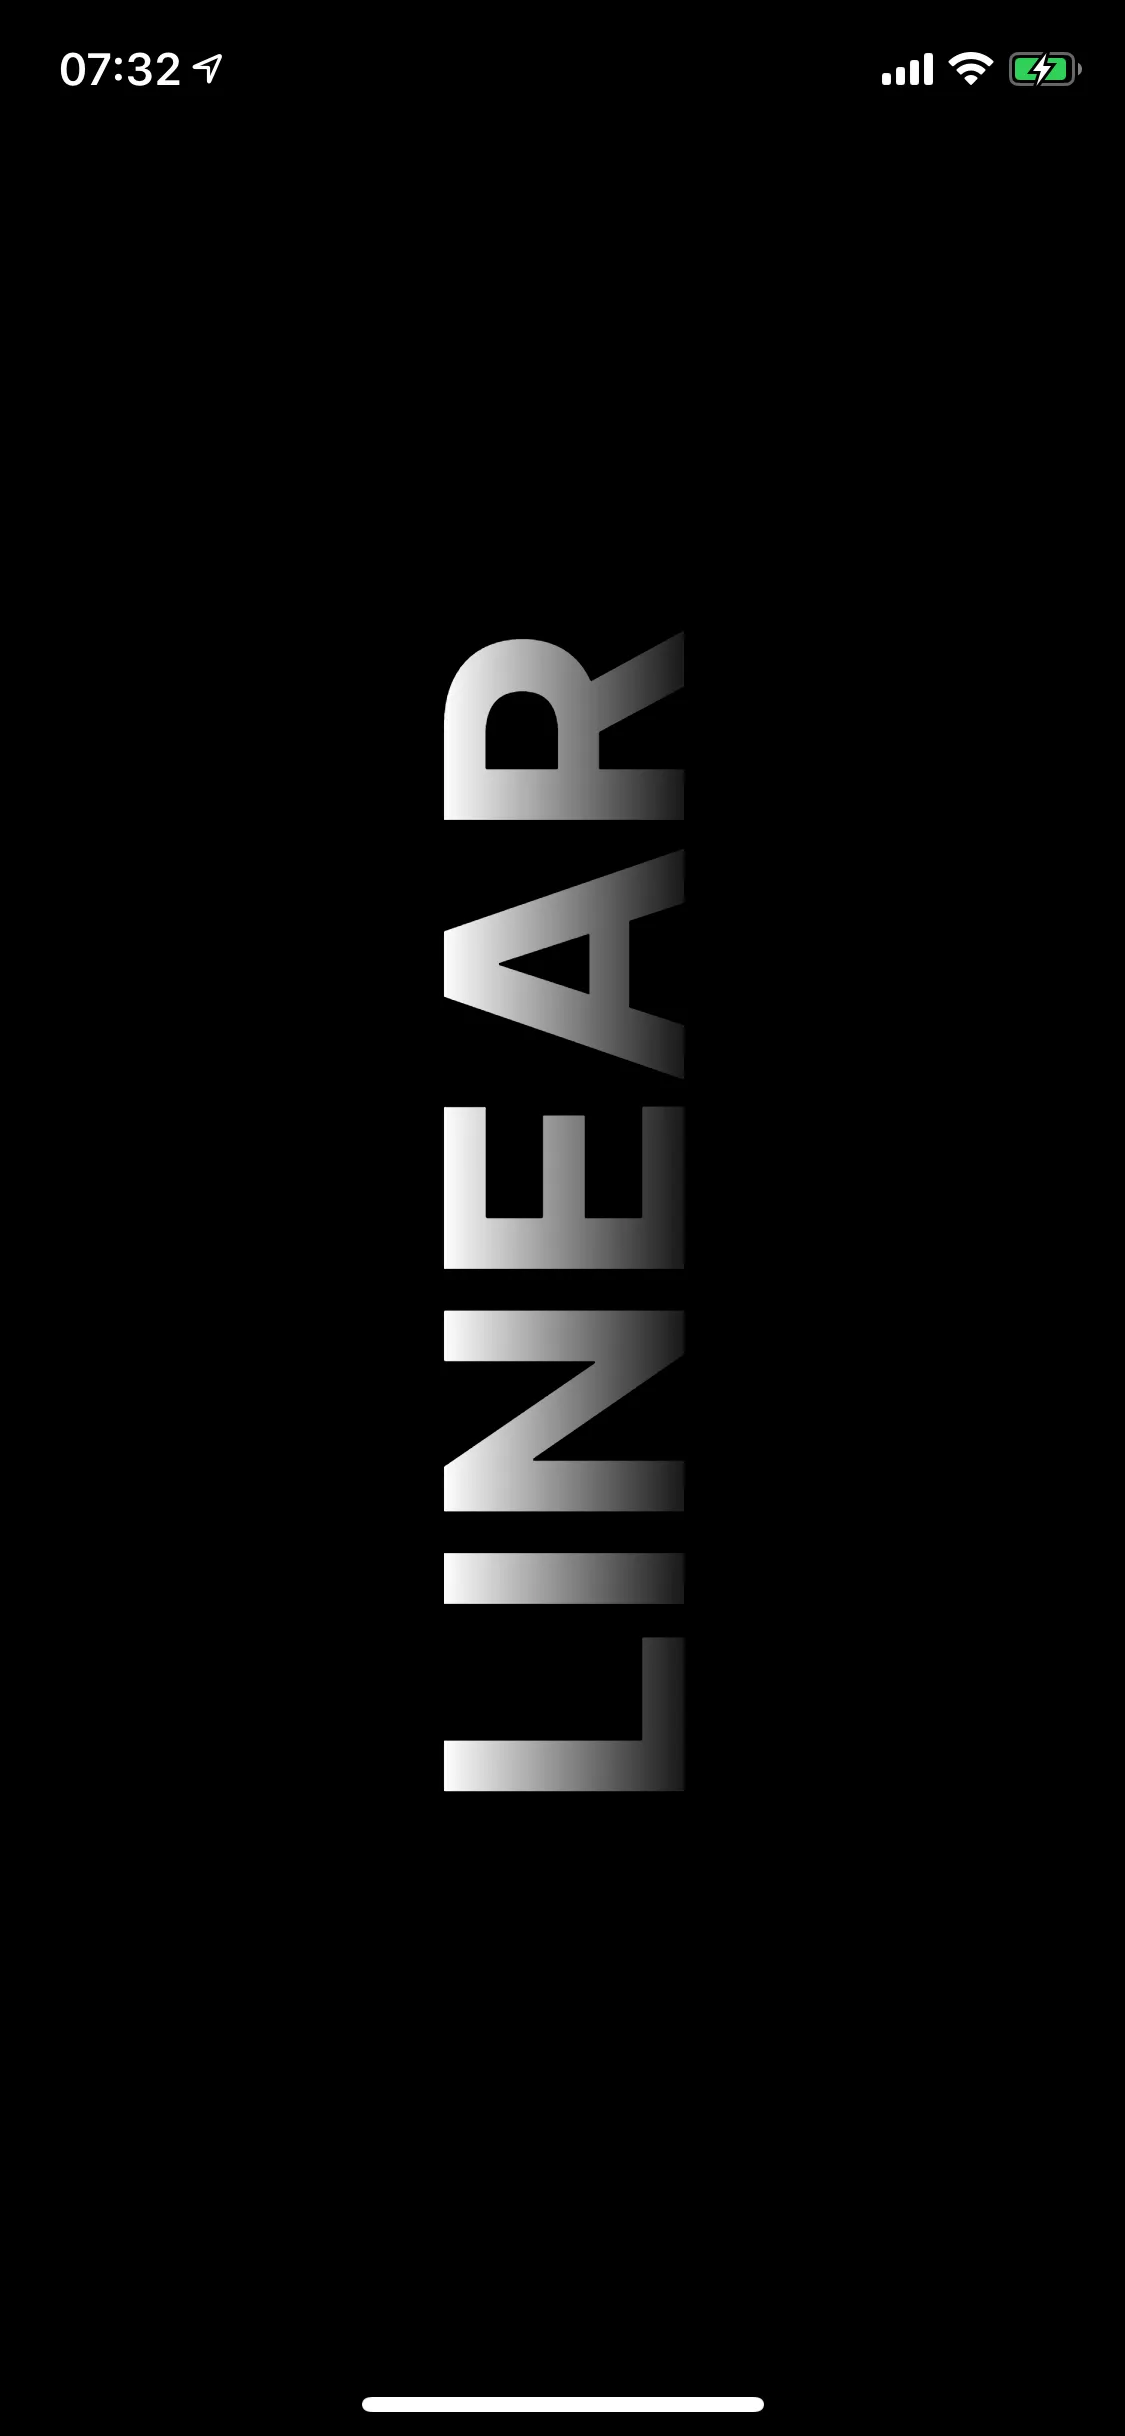
Now in order to add nice fade at the bottom of the text, we can put LinearGradient on top of our current widget. The gradient will go from black at the bottom, to transparent at the top. The following code shows a bit more advanced formula just to make it look nicer but the idea is the same:
class LinearText extends StatelessWidget { @override Widget build(BuildContext context) { return RotatedBox( quarterTurns: 3, child: Container( child: Text( 'LINEAR', style: TextStyle( color: Colors.white, fontSize: 110, ), ), foregroundDecoration: BoxDecoration( gradient: LinearGradient( colors: [ Colors.transparent, Colors.black.withOpacity(0.9), Colors.transparent ], begin: Alignment.bottomCenter, end: Alignment.topCenter, stops: [0.0, 0.2, 0.8], ), ), ), ); }}Now our LinearText will look like this:
Placing texts in a cilinder
Ok, we got the Linear Text, now it’s time to have 20 of those. In order to do it, we will generate list of 20 widgets and put them inside a Stack.
class HomePage extends StatefulWidget {  @override  _HomePageState createState() => _HomePageState();}
class _HomePageState extends State<HomePage> {  bool isOnRight(double rotation) => math.cos(rotation) < 0;
  @override  Widget build(BuildContext context) {    final numberOfTexts = 20;    return Scaffold(      body: SizedBox.expand(        child: Stack(          alignment: Alignment.center,          children: List.generate(            numberOfTexts,            (index) {              return LinearText();            },          ),        ),      ),    );  }}
Obviously, putting 20 identical elements on top of each other doesn’t change anything in what’s displayed on the screen. What we need to do is to rotate and translate each of those texts. In order to do that, we can use Transform widget like presented in the following snippet:
(index) { double rotation = 2 * math.pi * index / numberOfTexts; return Transform( alignment: Alignment.center, transform: Matrix4.identity() ..setEntry(3, 2, 0.001) //<--add perspective to the transformation ..rotateY(rotation) ..translate(-120.0), child: LinearText(), );},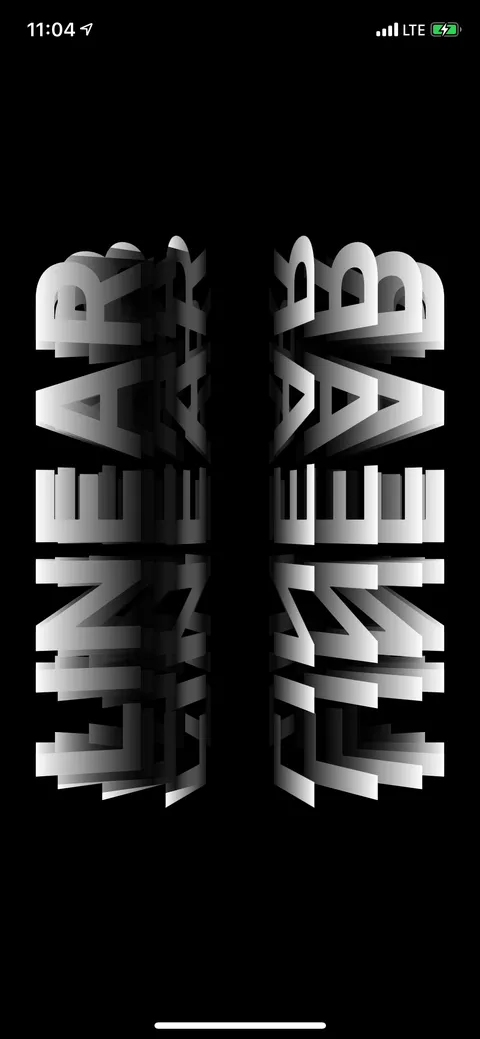
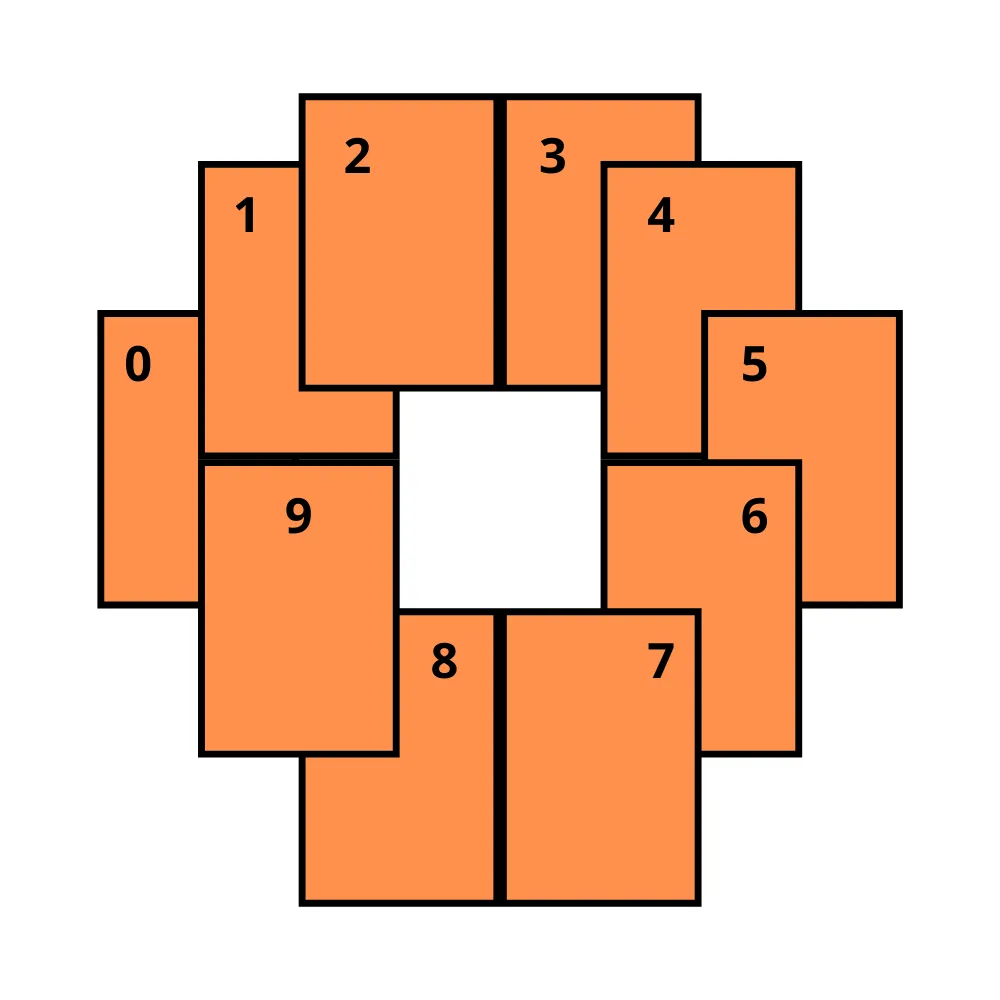
Now we can see 20 rotated and translated elements. However, as you probably can notice, it looks a bit odd on the left side of the image. The reason of such effect is that elements in the Stack are always covering the other ones based on their order in the children list. This means that the elements that are being clearly behind are being drawn on top of the others which looks terrible. 🤮
The graphics below can help you understand what is exactly happening there. You can see that the first element of the list (index 0 on left image) is covered by the last one (index 9). Now we need to figure out how to get from the order on the left to the order on the right, where elements in front of the user are never covered by the elements behind them.
What we have
What we need
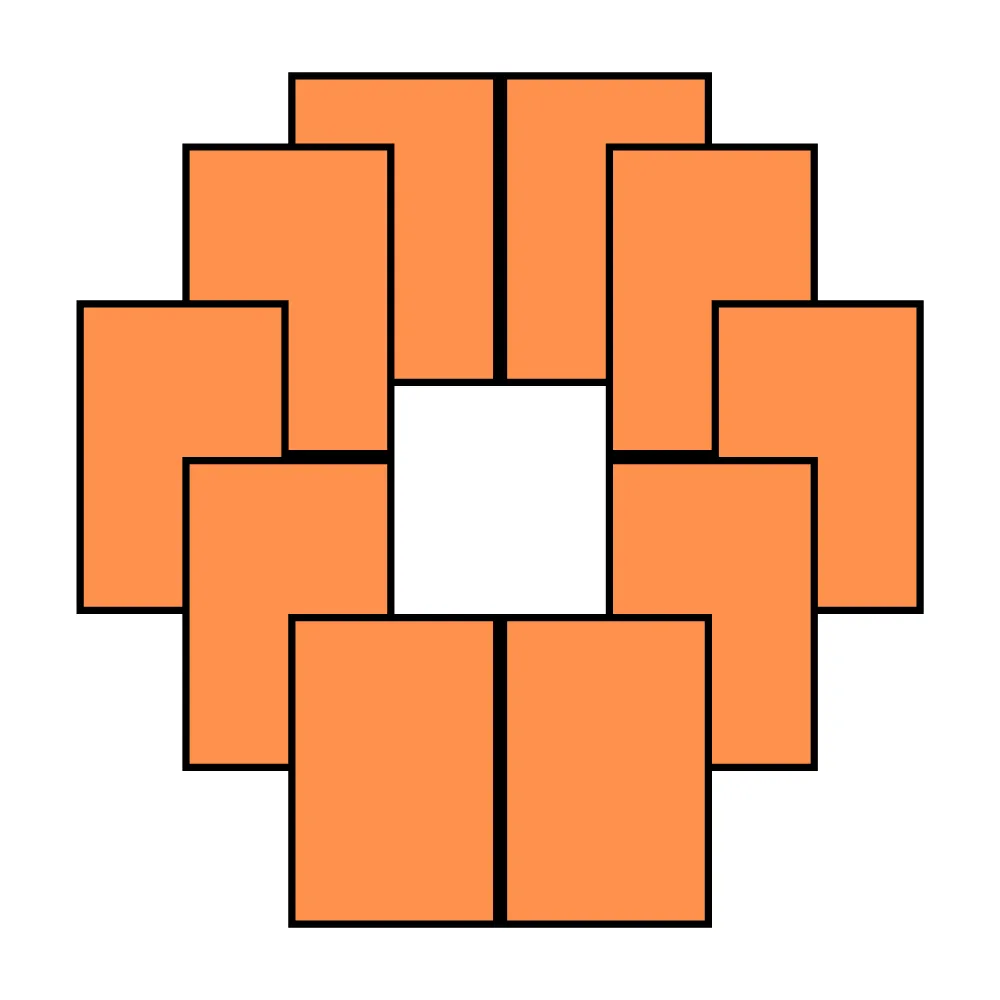
Luckily, we can achieve such effect in 2 simple steps:
First, we need to rotate each element by 90 degrees. This way we can easily separate the elements into left and right group.
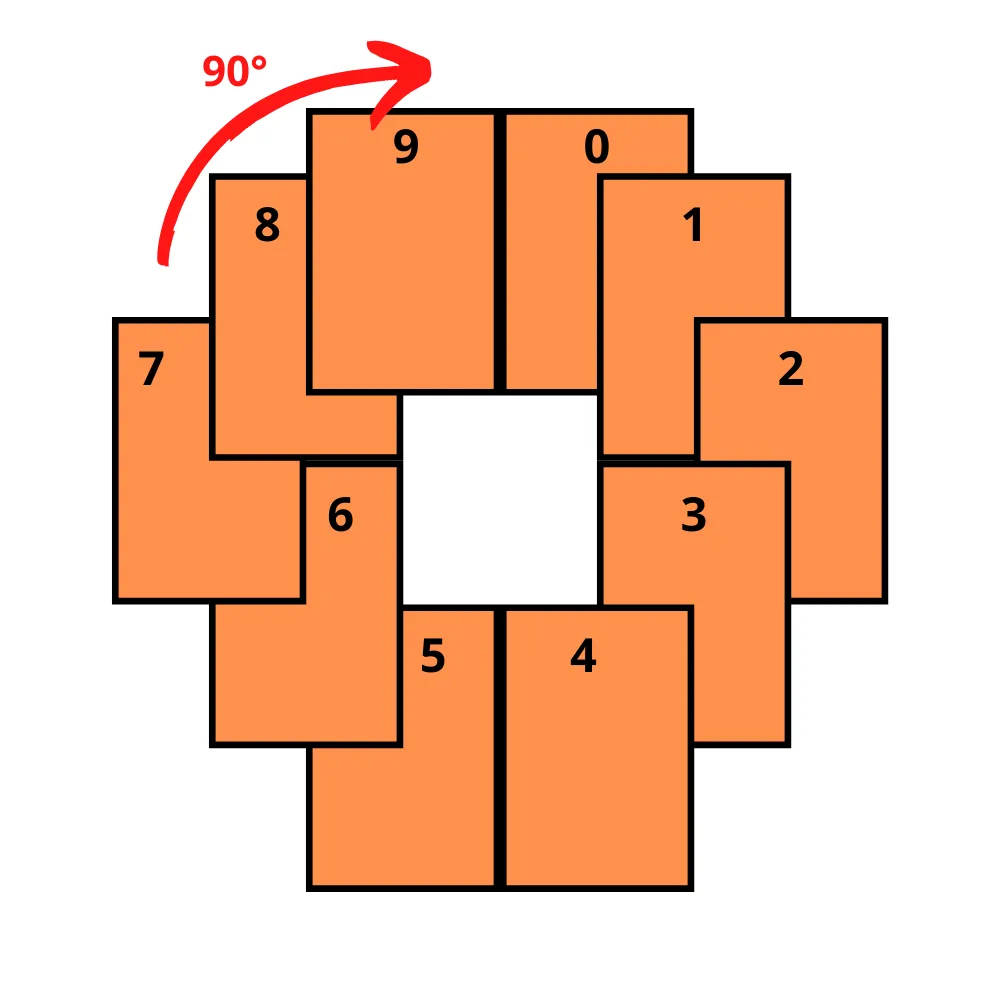
Then, all we need to do is flip the elements on the left side, so that the last one is in front (bottom of the image).
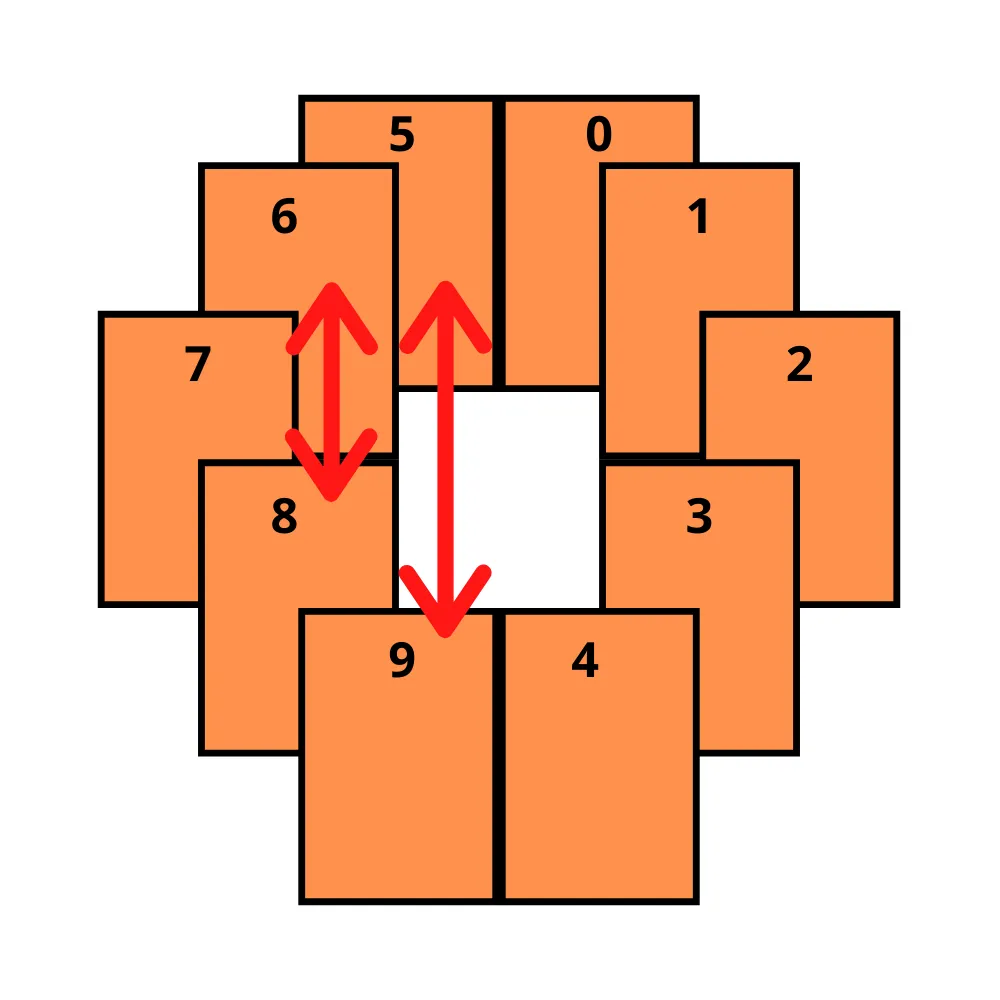
Those 2 steps are easily implementable with the following code:
class _HomePageState extends State<HomePage> {  bool isOnLeft(double rotation) => math.cos(rotation) > 0; //<---- check if angle is on the left
  @override  Widget build(BuildContext context) {    ...      (index) {        double rotation =            2 * math.pi * index / numberOfTexts + math.pi / 2; //<----add 90 degrees        if (isOnLeft(rotation)) {          rotation = -rotation;       //<----flip on the left side        }        return Transform(          alignment: Alignment.center,          transform: Matrix4.identity()            ..setEntry(3, 2, 0.001)            ..rotateY(rotation)   //<----use the updated rotation            ..translate(-120.0),          child: LinearText(),        );      },    ...  }}
And now it will look much better:
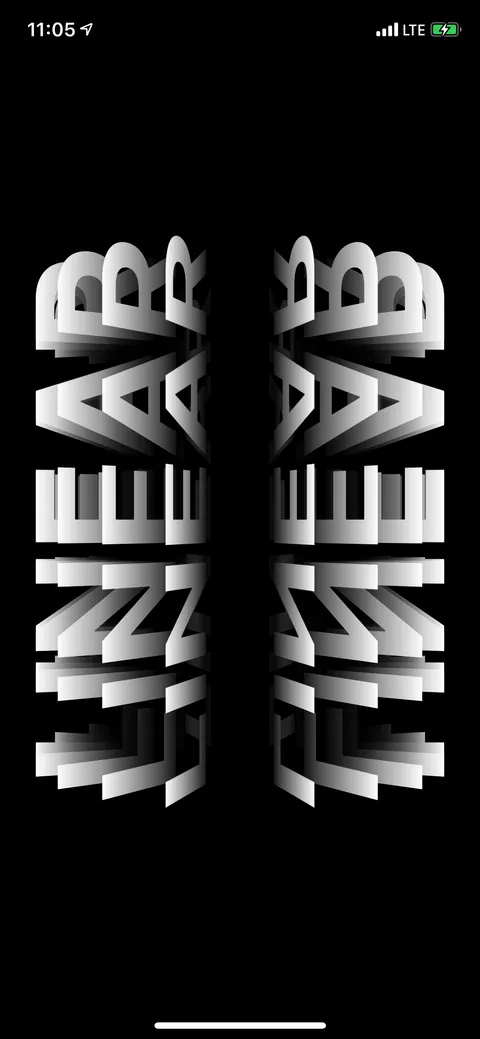
Adding movement
Now it’s time to make all those texts move! As usual, we will start with creating an AnimationController, which will drive the whole animation:
class _HomePageState extends State<HomePage> with SingleTickerProviderStateMixin {  AnimationController _animationController;
  @override  void initState() {    super.initState();    _animationController = AnimationController(      vsync: this,      duration: Duration(seconds: 2),    )..repeat();  }
  @override  void dispose() {    _animationController.dispose();    super.dispose();  }  ...}
Then, we need to update build method, so that for every element in the list, it will be moved by a small part of the circle. At first, we will need to use AnimatedBuilder widget, which will rebuild every text alongside the animation progress. Having that, all we need to do is take the animation’s value into account when calculating rotation value.
(index) { return AnimatedBuilder( //<--- wrap everything in AnimatedBuilder animation: _animationController, //<--- pass the controller child: LinearText(), //<--- set child for performance optimization builder: (context, child) { final animationRotationValue = _animationController.value * 2 * math.pi / numberOfTexts; //<-- calculate animation rotation value double rotation = 2 * math.pi * index / numberOfTexts + math.pi / 2 + animationRotationValue; //<-- add the animation value if (isOnLeft(rotation)) { rotation = -rotation + 2 * animationRotationValue - //<-- adjust the formula on the left side math.pi * 2 / numberOfTexts; } return Transform( ... ); }, );},The design
The implementation
And that’s it!
I know that my version is slower but it’s intentional – I like it this way. 🙂
The whole source code is available on my GitHub page.
Cheers! 🙂
PS: If you want to see how I got to the final result, be sure to see the uncut video on the process!