BMI Calculator in Flutter – part 1 – Gender
Hey, in this article I will go through implementation process of UI design. This time I teamed up with Johny Vino to fully implement one of his awesome designs: BMI Calculator in Flutter.
The design
I guess it’s good to start with some clarifications:
- I have the exact specs for this design so there will be no guessing on what the padding values should be etc. What’s more I have access to the assets so working with icons will be much easier.
- We want to implement more than just the view, our goal is to publish this app to the store. To do that, I have to keep in mind all the possible screen resolutions. Some logic will need to be implemented as well.
- I will split the implementation of this design to multiple posts so that it will be easier to read. In this post, I will cover the setup and gender indicator.
Let’s get to it!
0. Setup
First of all, it is worth noticing that the design is only meant for vertical orientation. To ensure that, we can either set it Android/iOS settings or (as a quick fix) we can use SystemChrome.setPreferredOrientations:
import 'package:bmi_calculator/input_page.dart';import 'package:flutter/material.dart';import 'package:flutter/services.dart';
void main() {  SystemChrome.setPreferredOrientations(          [DeviceOrientation.portraitUp, DeviceOrientation.portraitDown])      .then((_) => runApp(new MyApp()));}
class MyApp extends StatelessWidget {  @override  Widget build(BuildContext context) {    return MaterialApp(      debugShowCheckedModeBanner: false,      title: 'BMI Calculator',      theme: ThemeData(        primarySwatch: Colors.blue,      ),      home: InputPage(),    );  }}
As mentioned earlier, we need to keep in mind that we want to support every possible screen size. That means, that doing fixed sizes like height: 80.0 is not a good solution for us. However, I have design specs with specific margins and sizes for a device with the height of 650dp. In order to keep proportions similar for every device I came up with following util method:
import 'package:flutter/material.dart';
const double baseHeight = 650.0;
double screenAwareSize(double size, BuildContext context) {  return size * MediaQuery.of(context).size.height / baseHeight;}
This method uses MediaQuery.of(context).size which returns the actual device size in logical pixels. It means, we can convert the design value to device value so that proportions will remain the same. I will use this method mostly for vertical values since those are my main concerns for that project. This allows us to deploy on Nexus S as well as Pixel 2XL and have very similar UIs.
EDIT: Actually, we should use MediaQuery.of(context).size.shortestSide which is already known as swDp on Android. It allows using the scaling both in landscape and portrait. Thanks to Simon Lightfoot
1. Input screen layout
The input screen is the view where the user will input their metrics. I see it as a Column with three elements: title, cards, and swipe button:
import 'package:flutter/material.dart';import 'widget_utils.dart' show screenAwareSize;
class InputPage extends StatelessWidget {  Widget build(BuildContext context) {    return Scaffold(      body: Padding(        padding: MediaQuery.of(context).padding,        child: Column(          crossAxisAlignment: CrossAxisAlignment.start,          children: <Widget>[            _buildTitle(context),            Expanded(child: _buildCards(context)),            _buildBottom(context),          ],        ),      ),    );  }  ...}
As you can see, we wrapped everything in MediaQuery.padding so that we are sure we the view will not overlap with platform UI elements (if you are smarter than me, you should use SafeArea widget instead). The title and bottom button will take “fixed” amount of space and then the input cards will take the rest in the middle.
Title widget is pretty simple:
class InputPage extends StatelessWidget { ... Widget _buildTitle(BuildContext context) { return Padding( padding: EdgeInsets.only( left: 24.0, top: screenAwareSize(56.0, context), ), child: Text( "BMI Calculator", style: new TextStyle(fontSize: 28.0, fontWeight: FontWeight.bold), ), ); } ...}And in the bottom part, we will use a Switch as a placeholder:
class InputPage extends StatelessWidget { ... Widget _buildBottom(BuildContext context) { return Container( alignment: Alignment.center, height: screenAwareSize(108.0, context), width: double.infinity, child: Switch(value: true, onChanged: (val) {}), ); }}Notice using screenAwareSize method to take estimate the actual values of dimensions.
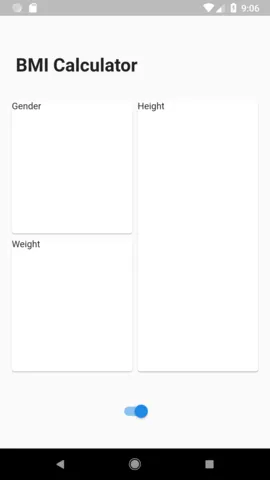
When it comes to building the middle part, it is just the combination of Rows, Columns and Expanded to make the cards split evenly:
class InputPage extends StatelessWidget {  ...  Widget _buildCards(BuildContext context) {    return Padding(      padding: EdgeInsets.only(        left: 14.0,        right: 14.0,        top: screenAwareSize(32.0, context),      ),      child: Row(        children: <Widget>[          Expanded(            child: Column(              children: <Widget>[                Expanded(child: _tempCard("Gender")),                Expanded(child: _tempCard("Weight")),              ],            ),          ),          Expanded(child: _tempCard("Height"))        ],      ),    );  }
  Widget _tempCard(String label) {    return Card(      child: Container(        width: double.infinity,        height: double.infinity,        child: Text(label),      ),    );  }  ...}
At this point we have something like this:
2. Static gender card
Now let’s create a Gender Card widget that will be used to select gender by a user. Before we get into implementing UI, we need to create a Gender model:
enum Gender { male, female, other }2.1 Title widget
Let’s start with a title, we can see in the design that the title has the same style for every card, so it will be a good idea to extract it to separate widget:
import 'package:flutter/material.dart';
class CardTitle extends StatelessWidget {  final String title;
  const CardTitle(this.title, {Key key}) : super(key: key);
  @override  Widget build(BuildContext context) {    return Text(      title,      style: new TextStyle(fontSize: 16.0, fontWeight: FontWeight.w500),    );  }}
Let’s add it the GenderCard widget:
import 'package:bmi_calculator/card_title.dart';import 'package:bmi_calculator/gender.dart';import 'package:flutter/material.dart';
import 'widget_utils.dart' show screenAwareSize;
class GenderCard extends StatefulWidget {  final Gender initialGender;
  const GenderCard({Key key, this.initialGender}) : super(key: key);
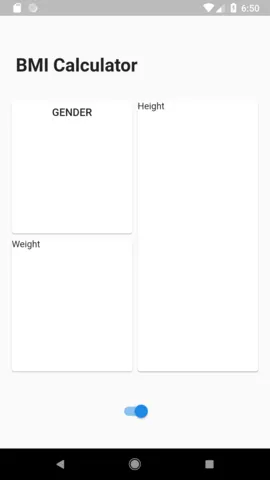
  @override  _GenderCardState createState() => _GenderCardState();}class _GenderCardState extends State<GenderCard> {  @override  Widget build(BuildContext context) {    return Card(      child: SizedBox(        width: double.infinity,        child: Padding(          padding: EdgeInsets.only(top: screenAwareSize(8.0, context)),          child: Column(            crossAxisAlignment: CrossAxisAlignment.center,            children: <Widget>[              CardTitle("GENDER"),            ],          ),        ),      ),    );  }}
And after that add that card into InputPage:
import 'package:bmi_calculator/gender_card.dart';
class InputPage extends StatelessWidget {  Widget _buildCards(BuildContext context) {    return ...            child: Column(              children: <Widget>[                Expanded(child: GenderCard()),                Expanded(child: _tempCard("Weight")),              ],            ),          ...  }  ...}
This is what we got for now:
2.2 Grey circle
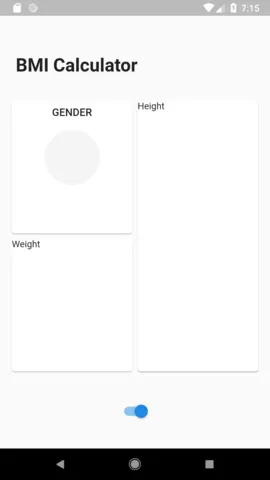
We will display all of our contents in Stacks since it allows us to draw Widgets on top of each other.
double _circleSize(BuildContext context) => screenAwareSize(80.0, context);
class _GenderCardState extends State<GenderCard> {  @override  Widget build(BuildContext context) {    return ...          child: Column(            crossAxisAlignment: CrossAxisAlignment.center,            children: <Widget>[              CardTitle("GENDER"),              Padding(                padding: EdgeInsets.only(top: screenAwareSize(16.0, context)),                child: _drawMainStack(),              ),            ],          ),        ...  }
  Widget _drawMainStack() {    return Stack(      alignment: Alignment.bottomCenter,      children: <Widget>[        _drawCircleIndicator(),      ],    );  }
  Widget _drawCircleIndicator() {    return Stack(      alignment: Alignment.center,      children: <Widget>[        GenderCircle(),      ],    );  }
}

class GenderCircle extends StatelessWidget {  @override  Widget build(BuildContext context) {    return Container(      width: _circleSize(context),      height: _circleSize(context),      decoration: BoxDecoration(        shape: BoxShape.circle,        color: Color.fromRGBO(244, 244, 244, 1.0),      ),    );  }}
As you can see, there are 2 stacks which at this moment could be avoided, they will stay here because we will need them in later stages. In addition to those stacks, we created simple GenderCircle widget which surprisingly will draw a circle 🙂 The circle will move down when we add gender icons.
2.3 Gender icons
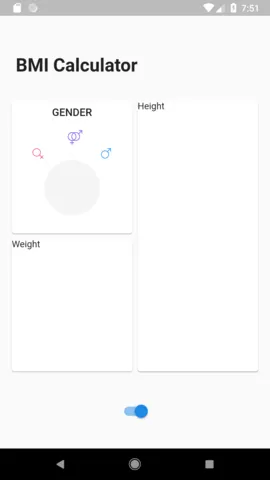
There are three gender icons, each above the circle but with a different angle. To place them in the right spots we need to move them to the center of the circle, then rotate, then move outside the circle and then rotate again to straighten them up. We will also draw small lines between icons and the circle.
Let’s start with a line:
class GenderLine extends StatelessWidget { @override Widget build(BuildContext context) { return Padding( padding: EdgeInsets.only( bottom: screenAwareSize(6.0, context), top: screenAwareSize(8.0, context), ), child: Container( height: screenAwareSize(8.0, context), width: 1.0, color: Color.fromRGBO(216, 217, 223, 0.54), ), ); }}Now let’s take a look at gender icon widget:
import 'dart:math' as math;import 'package:flutter_svg/flutter_svg.dart';
const double _defaultGenderAngle = math.pi / 4;const Map<Gender, double> _genderAngles = {  Gender.female: -_defaultGenderAngle,  Gender.other: 0.0,  Gender.male: _defaultGenderAngle,};
class GenderIconTranslated extends StatelessWidget {  static final Map<Gender, String> _genderImages = {    Gender.female: "images/gender_female.svg",    Gender.other: "images/gender_other.svg",    Gender.male: "images/gender_male.svg",  };
  final Gender gender;
  const GenderIconTranslated({Key key, this.gender}) : super(key: key);
  bool get _isOtherGender => gender == Gender.other;
  String get _assetName => _genderImages[gender];
  double _iconSize(BuildContext context) {    return screenAwareSize(_isOtherGender ? 22.0 : 16.0, context);  }
  double _genderLeftPadding(BuildContext context) {    return screenAwareSize(_isOtherGender ? 8.0 : 0.0, context);  }
  @override  Widget build(BuildContext context) {    Widget icon = Padding(      padding: EdgeInsets.only(left: _genderLeftPadding(context)),      child: SvgPicture.asset(        _assetName,        height: _iconSize(context),        width: _iconSize(context),      ),    );
    Widget rotatedIcon = Transform.rotate(      angle: -_genderAngles[gender],      child: icon,    );
    Widget iconWithALine = Padding(      padding: EdgeInsets.only(bottom: _circleSize(context) / 2),      child: Column(        crossAxisAlignment: CrossAxisAlignment.center,        children: <Widget>[          rotatedIcon,          GenderLine(),        ],      ),    );
    Widget rotatedIconWithALine = Transform.rotate(      alignment: Alignment.bottomCenter,      angle: _genderAngles[gender],      child: iconWithALine,    );
    Widget centeredIconWithALine = Padding(      padding: EdgeInsets.only(bottom: _circleSize(context) / 2),      child: rotatedIconWithALine,    );
    return centeredIconWithALine;  }}
Few things need explaining in this view:
- The default angle is the angle between the middle gender icon and side ones and it is equal to 45 degrees (or pi/4).
- We store angles for each gender outside the widget because we will reuse it when drawing an indicator arrow.
- Since we have access to svg assets, we are using Dan Field’s flutter_svg package to load them.
- The Other gender (middle one) is treated a bit differently. Since the middle icon consists of two icons, we make it a bit bigger so that it matches the rest. We also want to move the icon a bit to the right so that it nicely aligns with the grey line.
How we build the widget:
- Draw svg icon.
- Rotate it in the opposite direction to where it will be placed.
- Add a line below the icon (with paddings).
- Rotate icon with a line in the target direction (at this point icon is straight again but the line remained rotated in the desired direction).
- Lift “base” of the widget up half the size of the circle. This will make all icons look like they are centered around the middle of the circle.
It should like this:
2.4 The arrow
Now it’s time to add Arrow widget:
class GenderArrow extends StatelessWidget {  final double angle;
  const GenderArrow({Key key, this.angle}) : super(key: key);
  double _arrowLength(BuildContext context) => screenAwareSize(32.0, context);
  double _translationOffset(BuildContext context) => _arrowLength(context) * -0.4;
  @override  Widget build(BuildContext context) {    return Transform.rotate(      angle: angle,      child: Transform.translate(        offset: Offset(0.0, _translationOffset(context)),        child: Transform.rotate(          angle: -_defaultGenderAngle,          child: SvgPicture.asset(            "images/gender_arrow.svg",            height: _arrowLength(context),            width: _arrowLength(context),          ),        ),      ),    );  }}
Those are operations performed to get the arrow:
- Draw an svg image.
- Since the image is rotated by default, we want to rotate it back so that arrow is pointing towards the middle.
- We move (translate) an arrow so that it is “pinned” to the center of the screen.
- We rotate arrow to the angle provided in the constructor.
Now let’s use that widget:
class _GenderCardState extends State<GenderCard> { ... Widget _drawCircleIndicator() { return Stack( alignment: Alignment.center, children: <Widget>[ GenderCircle(), GenderArrow(angle: _genderAngles[Gender.female]), ], ); }}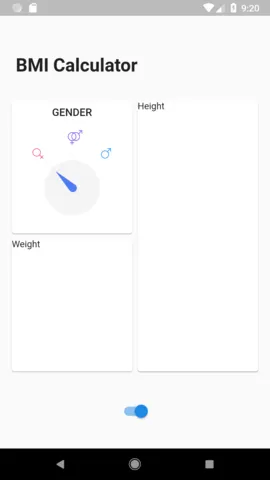
3. Interactivity
3.1 Handle tapping
Now we can finally allow the user to change the gender on tap. We could add GestureDetector on icons but they are relatively small, so it would be hard to click them. I figured out that the easiest solution is to split the gender card into 3 equal columns, each assigned to one gender. This way it will be easy for the user to change the gender. Let’s start with GestureDetector:
class TapHandler extends StatelessWidget {  final Function(Gender) onGenderTapped;
  const TapHandler({Key key, this.onGenderTapped}) : super(key: key);
  @override  Widget build(BuildContext context) {    return Row(      mainAxisSize: MainAxisSize.max,      children: <Widget>[        Expanded(child: GestureDetector(onTap: () => onGenderTapped(Gender.female))),        Expanded(child: GestureDetector(onTap: () => onGenderTapped(Gender.other))),        Expanded(child: GestureDetector(onTap: () => onGenderTapped(Gender.male))),      ],    );  }}
As you can see, there is nothing complicated here. Now let’s use that widget:
class _GenderCardState extends State<GenderCard> {  Gender selectedGender;
  @override  void initState() {    selectedGender = widget.initialGender ?? Gender.other; //<--- initialize selected gender    super.initState();  }
   Widget _drawMainStack() {    return Container(      width: double.infinity, //<--- Expand stack width      child: Stack(        alignment: Alignment.bottomCenter,        children: <Widget>[          _drawCircleIndicator(),          GenderIconTranslated(gender: Gender.female),          GenderIconTranslated(gender: Gender.other),          GenderIconTranslated(gender: Gender.male),          _drawGestureDetector(), //<--- Add gesutre detector        ],      ),    );  }
  Widget _drawCircleIndicator() {    return Stack(      alignment: Alignment.center,      children: <Widget>[        GenderCircle(),        GenderArrow(angle: _genderAngles[selectedGender]),//<--- make arrow display current gender      ],    );  }
  _drawGestureDetector() {    return Positioned.fill(      child: TapHandler(        onGenderTapped: (gender) => setState(() => selectedGender = gender),      ),    );  }}
Again, there is nothing complicated here, we use Positioned.fill to make TapHandler fill the whole stack, and then we just handle the taps. We had to make one change regarding the width of the widgets. I removed SizedBoxfrom build method and replaced it with a Container in _drawMainStackmethod so that the stack would expand itself to full width.
3.2 Animation
The last part is to animate the arrow movement. We will do it by creating an AnimationController in GenderCard and passing it to the GenderArrowwidget. Let’s get to it:
class _GenderCardState extends State<GenderCard> with SingleTickerProviderStateMixin {  AnimationController _arrowAnimationController; //<--- Add controller  Gender selectedGender;
  @override  void initState() {    selectedGender = widget.initialGender ?? Gender.other;    _arrowAnimationController = new AnimationController( //<--- initialize animation controller      vsync: this,      lowerBound: -_defaultGenderAngle,      upperBound: _defaultGenderAngle,      value: _genderAngles[selectedGender],    );    super.initState();  }
  @override  void dispose() {    _arrowAnimationController.dispose(); //<--- dispose controller when we're done    super.dispose();  }
  Widget _drawCircleIndicator() {    return Stack(      alignment: Alignment.center,      children: <Widget>[        GenderCircle(),        GenderArrow(listenable: _arrowAnimationController), //<--- Update constructor      ],    );  }
  _drawGestureDetector() {    return Positioned.fill(      child: TapHandler(        onGenderTapped: _setSelectedGender, //<--- Update tap handling      ),    );  }
  void _setSelectedGender(Gender gender) {    setState(() => selectedGender = gender);    _arrowAnimationController.animateTo( //<--- Animate the arrow      _genderAngles[gender],      duration: Duration(milliseconds: 150),    );  }}

class GenderArrow extends AnimatedWidget { //<--- Use AnimatedWidget  const GenderArrow({Key key, Listenable listenable}) : super(key: key, listenable: listenable);
  @override  Widget build(BuildContext context) {    Animation animation = listenable;    return Transform.rotate(      angle: animation.value, //<--- use animation value      ...    );  }}
Ok, so what we’ve done here:
- We added
SingleTickerProviderMixin - We created
AnimationControllerwhich can have values from max left angle to max right angle - We pass that controller to the
GenderArrow - We changed parent Widget of
GenderArrowtoAnimatedWidget. This way it will rebuild itself on every controller update. - We change tap handling not only to set state but also to animate the arrow with the fixed duration.
And that’s it!
This is how the final result for this part looks like:
You can find the full code for this part here. More posts about this project will be available here.
Cheers 🙂